This week we deployed a long-awaited update- the trigger by Hexowatch that allows monitoring any page for changes in Hexowatch and triggering marketing, sales, or research tasks in Hexomatic when any change is detected.
This feature opens an infinite number of possibilities to carry out tasks, including:
Monitoring web directories in Hexowatch, and if new listings are detected, automatically run a scraping workflow to capture all the data.
Monitoring product pages in Hexowatch, and if a price change is detected, automatically create a post in WordPress.
Monitoring pages in Hexowatch for tech changes, then run a series of audits in Hexomatic when specific conditions are met.
In this tutorial, we are going to monitor our blog for updates using Hexowatch, and automatically trigger a workflow in Hexomatic which will check the page for spelling and grammar mistakes.
Step 1: Create a new monitor on Hexowatch
As a first step, we are going to create a new Visual monitor on Hexowatch to monitor to detect changes on the targeted webpage (Hexomatic academy webpage).
From your dashboard, go to URL and select Visual monitor.
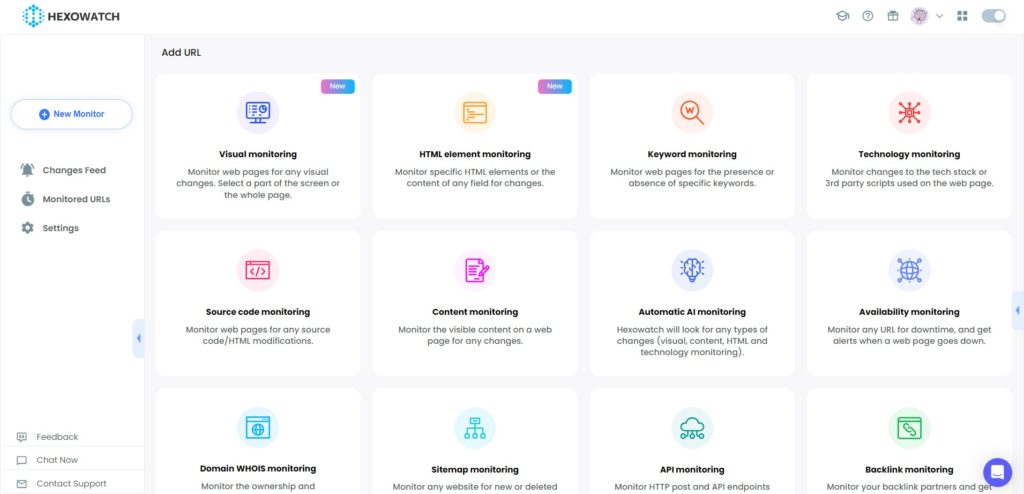
Step 2: Add the website URL
Next, add the targeted website URL, specify the changes, and set the frequency of checks. After filling in all the required fields, click Preview.
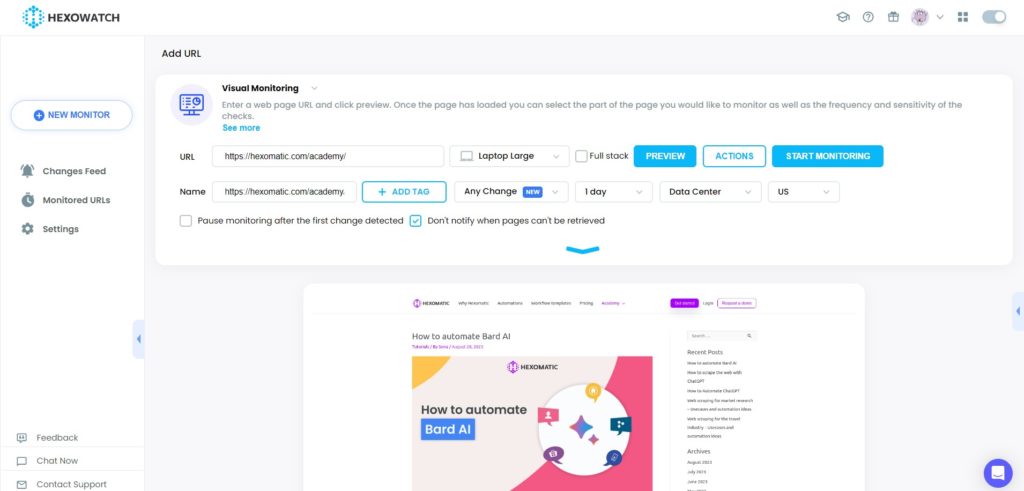
Step 3: Create a new workflow in Hexomatic
From your dashboard, create a new workflow by choosing the “blank” option. Then, select Data automation as a starting point.
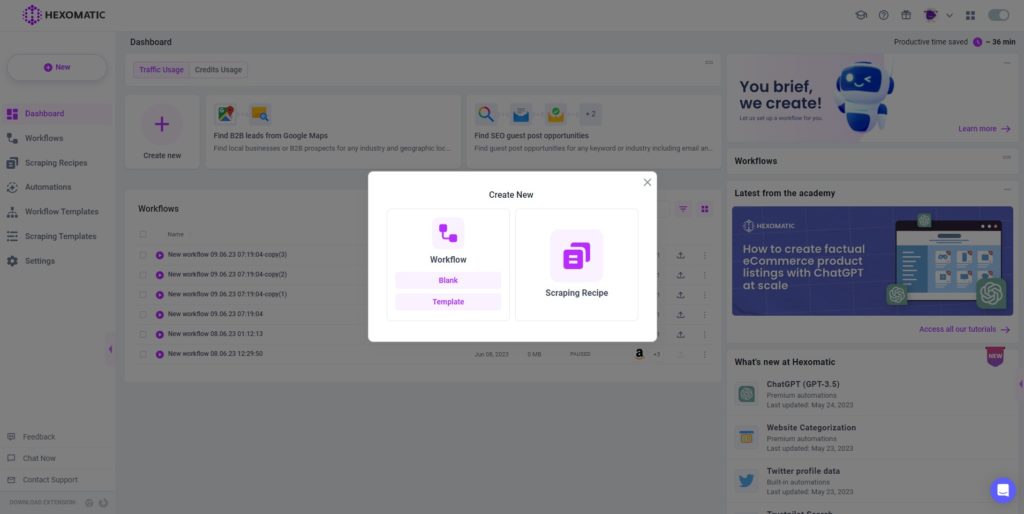
Step 4: Add the URL of the page
Next, add the URL of the page to run the workflow. The URL in the data input of a workflow should be the same as the URL of the targeted active monitoring page from Hexowatch.
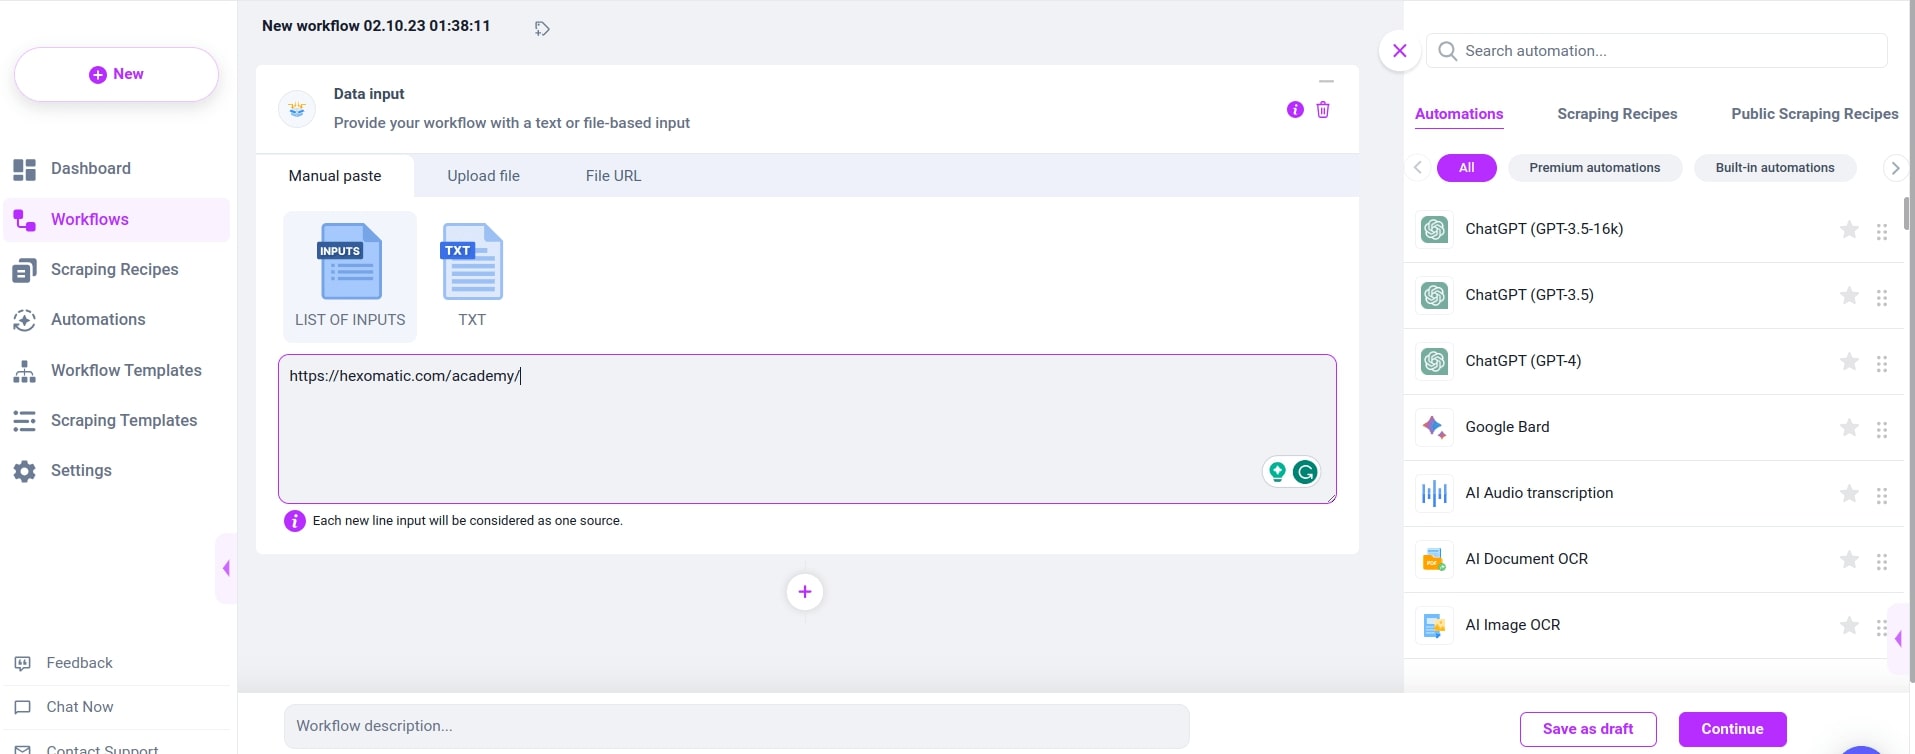
Step 5: Add the automation
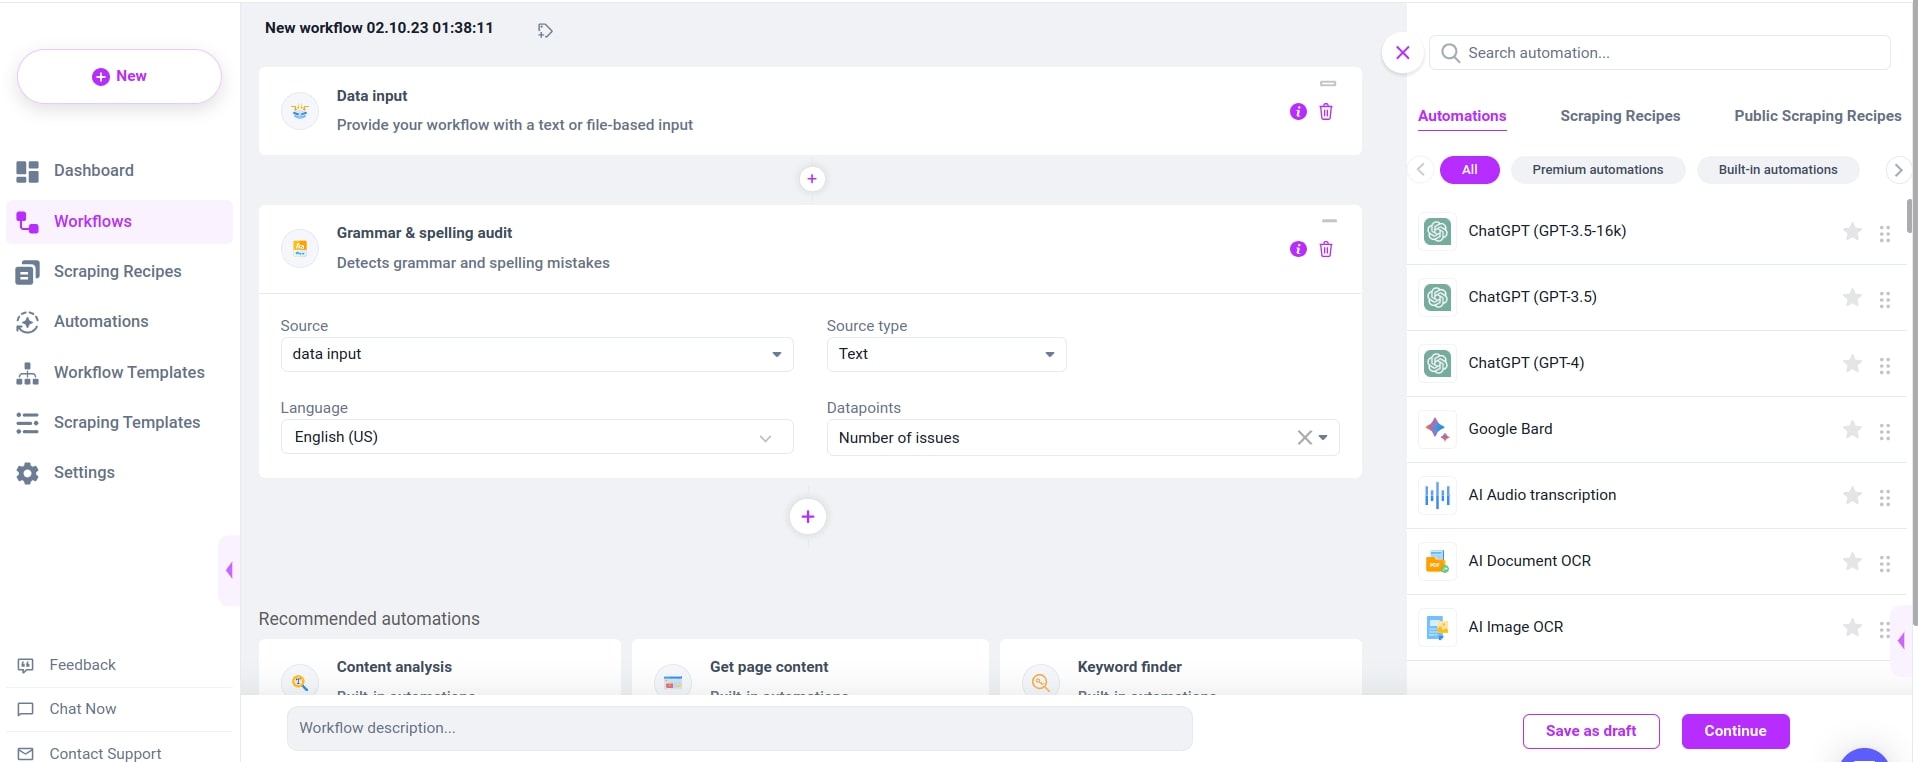
Add the automation you want to run on the active monitor. In this case, we will check the grammar on the updated webpage of Hexomatic.
In our example, we will add the Grammar and Spelling audit automation, selecting data input as the source and choosing to display the number of issues as a datapoint.
After filling in all the required fields, click Continue.
Step 6: Run trigger by Hexowatch
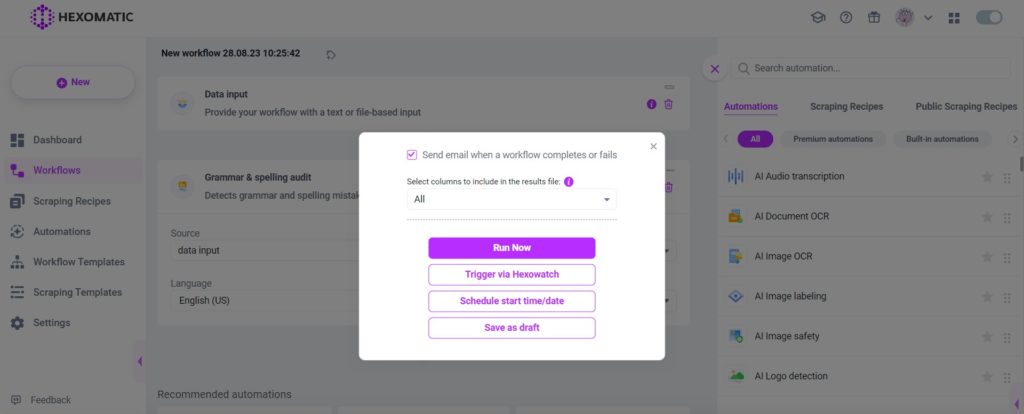
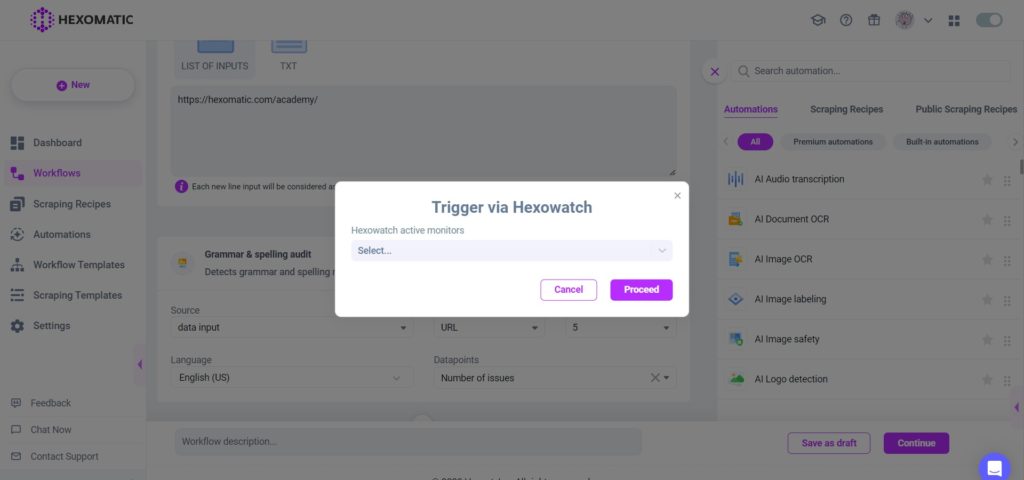
Next, run Trigger by Hexowatch and choose the active monitor to run the workflow. After selecting, click Proceed.
Step 7: View and save the results
Finally, once your workflow has finished running, you can then review your data in the Results Preview and export it in CSV or Google Sheets.

Automate & scale time-consuming tasks like never before

Marketing Specialist | Content Writer
Experienced in SaaS content writing, helps customers to automate time-consuming tasks and solve complex scraping cases with step-by-step tutorials and in depth-articles.
Follow me on Linkedin for more SaaS content
