Images have become an essential part of today’s digital world. They are used everywhere, from social media posts to personal projects and websites. In fact, about 82% of all websites include any kind of visual content.
With the existence of so different image formats, it can be challenging to manage them all.
For instance, you may need to convert hundreds of images at once. As anyone who has tried that before knows manually converting images is a tedious and time-consuming task, taking away precious time that could be better spent on more important tasks.
Here is where bulk image conversion comes in! This is the process of converting multiple images simultaneously. You can convert a large number of images from one format to another at once, with just a few simple clicks.
Once you learn how to convert images in bulk, you’ll be able to save time and energy for other important aspects of your work.
Note that bulk image conversion is especially useful for web developers, graphic designers, photographers, and anyone who works with images regularly:
🔸 Photographers convert images at scale to prepare them for printing, online sharing, etc.
🔸 Graphic designers, on the other hand, can conveniently convert the formats of graphics to fit different applications, such as designing brochures, website banners, flyers, and more.
🔸 Web developers benefit from bulk image conversion by optimizing website images for faster loading times, improving website performance and user experience.
In this tutorial, we will show you how to convert images at scale in just a few minutes with Hexomatic!
Before getting started, be sure to have a Hexomatic.com account.
Step 1: Create a new workflow
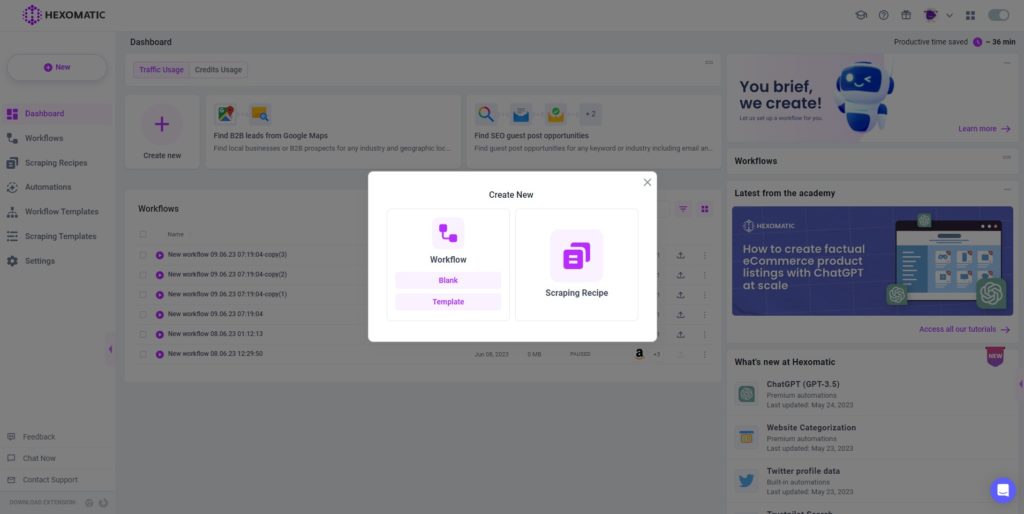
To get started, go to the Hexomatic dashboard and create a new workflow by choosing the blank option. Then, choose the data input automation as your starting point.
Step 2: Upload images or provide a list of URLs
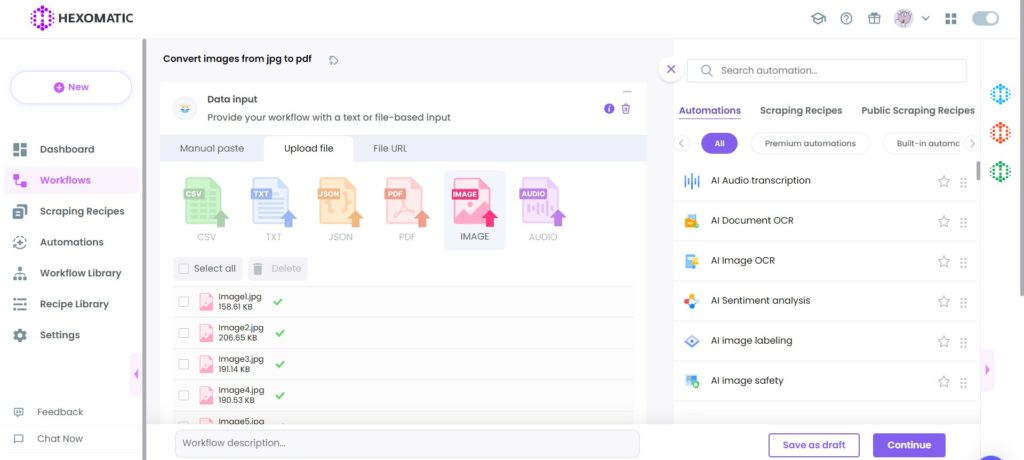
There are two options for converting images with Hexomatic. You can either upload images directly from your computer or add the URLs manually.
Option 1: Upload images
You can add images by choosing the Upload Files section and uploading the required images to Hexomatic.
Option 2: Add image URLs
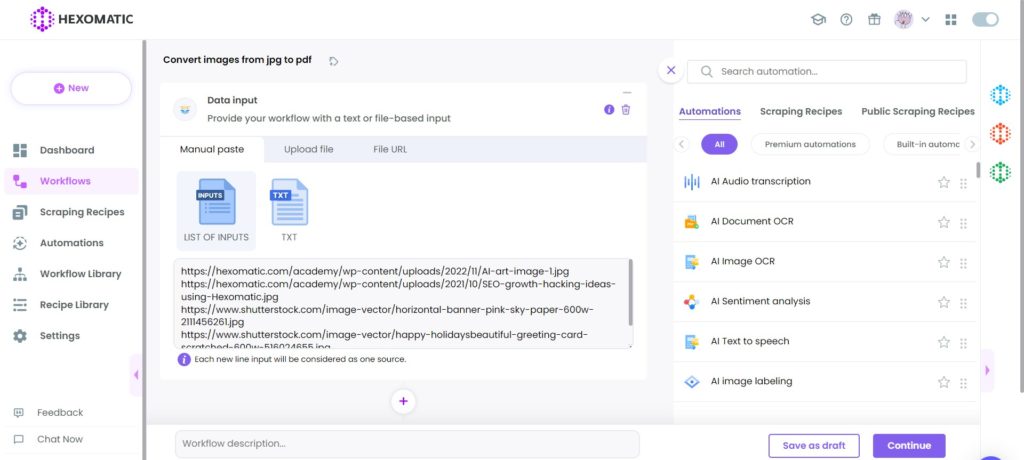
For the second option, you can copy the list of image URLs and paste them using the Manual paste/ List of Inputs option.
Step 3: Add the Image converter automation
Next, add the Image converter automation to your workflow. Then, choose Data Input as the source.
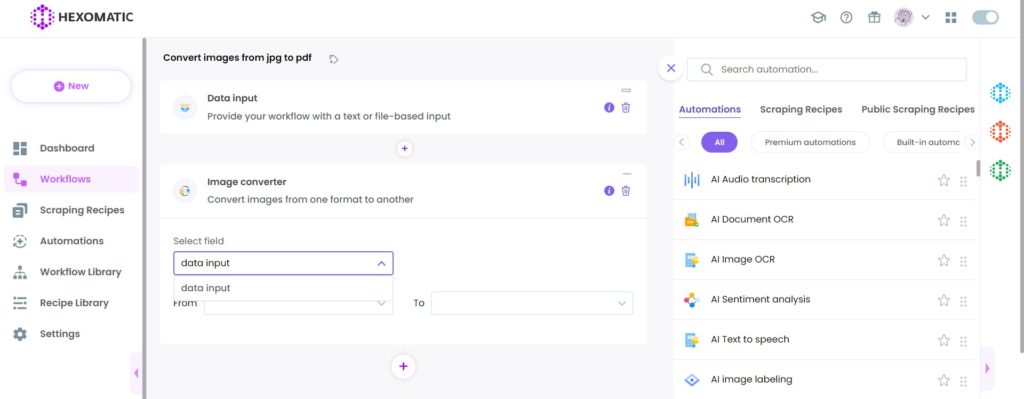
This automation allows you to convert your image files into the following formats:
🔹 jpeg
🔹 png
🔹 gif
Once you’ve chosen the required format, click on Continue.
In this example, we demonstrate how to convert multiple images to pdf in bulk.
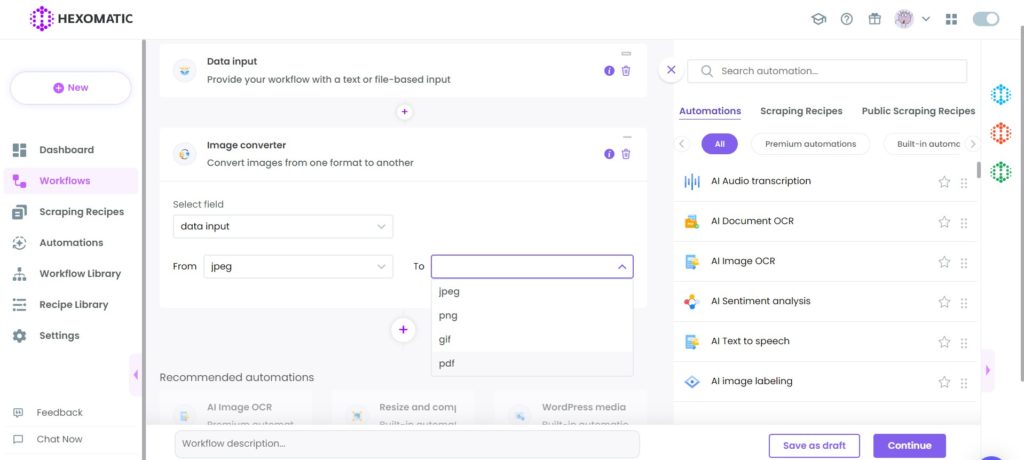
If you want to convert all the images to a single pdf file, you can tick the option “all images convert to one pdf”.

Step 4: Add Google Drive automation (optional)
This option will allow you to save the converted images directly in your Google Drive.
For this step, make sure to have your Google account integrated into Hexomatic. To check it, go to Settings, then have a look at the Integrations section.
After connecting to your Google account, add the Google Drive automation. Then, specify the account and the source. You can also create a new folder or add an existing one to save the files.
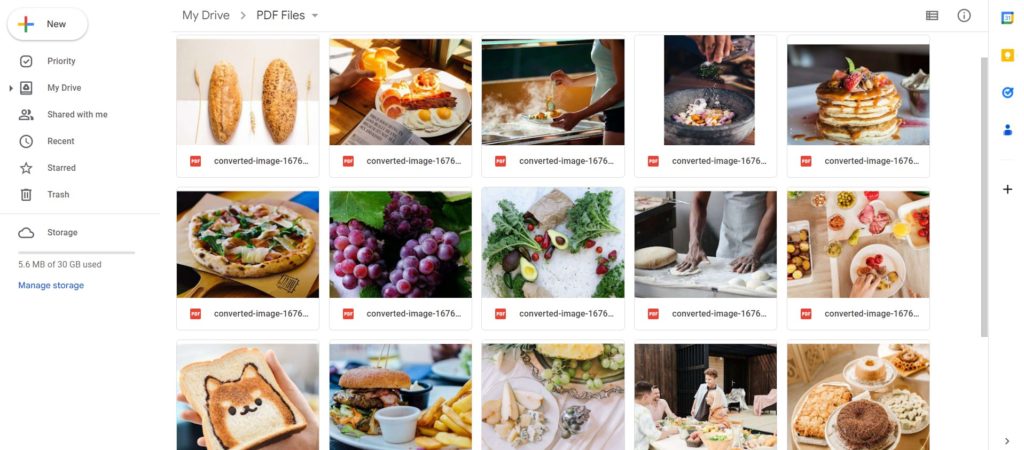
In our case, we have chosen the pdf converter as a source and created a new folder “PDF files” to save the images there.
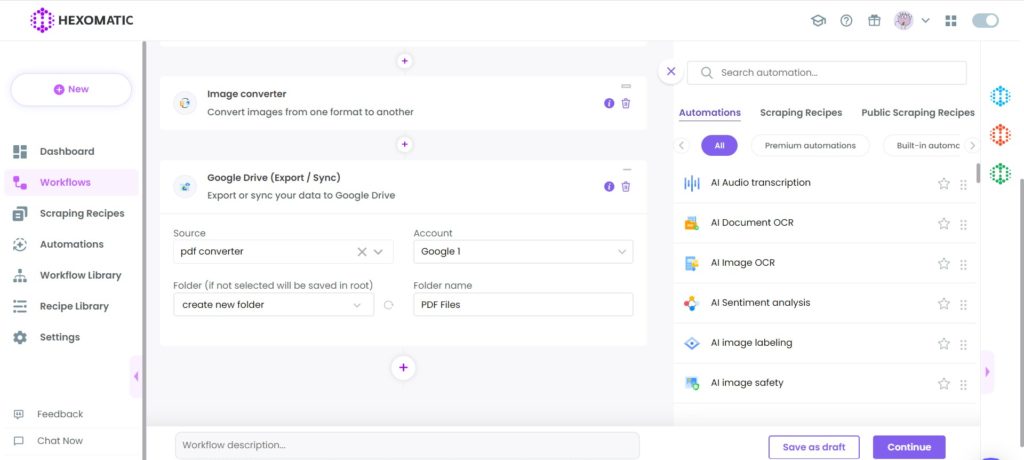
Click on Continue to move to the next step.
Step 5: Run the workflow
Next, run your workflow by clicking on the Run Now button.
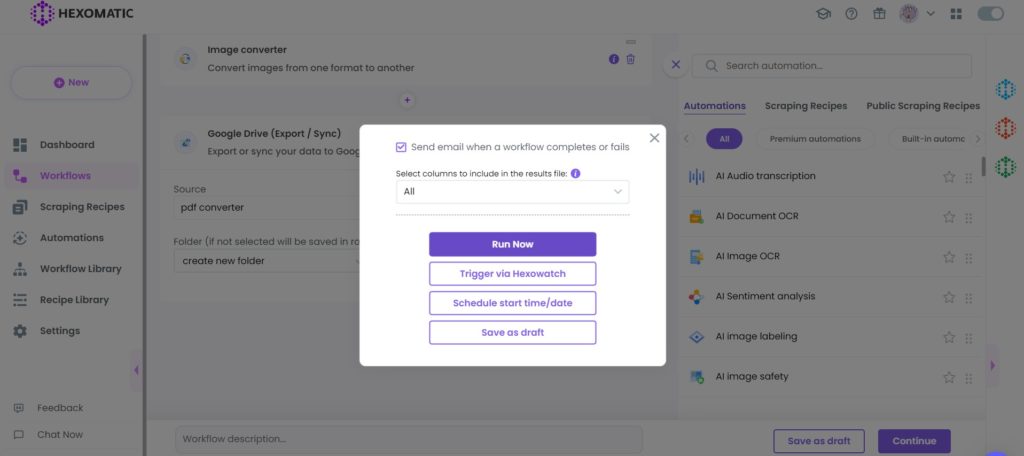
Step 6: View and save the results
Once the workflow is completed, click on the Google Drive link to view the converted files in your Google Drive folder.
Automate & scale time-consuming tasks like never before

Content Writer | Marketing Specialist
Experienced in writing SaaS and marketing content, helps customers to easily perform web scrapings, automate time-consuming tasks and be informed about latest tech trends with step-by-step tutorials and insider articles.
Follow me on Linkedin
