Web scraping has revolutionized the way millions of people and businesses work, eliminating the most time-consuming and labor-intensive tasks.
No code web scraping tools like Hexomatic provide a fully automatic point-and-click interface enabling users to scrape just about any website.
However, there are websites which require manual selection of CSS selectors in order to capture data correctly.
The good news is that Hexomatic in addition to its point-and-click interface can provide you with more advanced features to tackle more complex projects.
Particularly, Hexomatic lets you use Google Chrome’s developer tools to isolate elements you need to capture, copy-paste their CSS selector and use it natively inside Hexomatic.
This way you can scrape any element that is not possible to scrape using a simple point-and-click.
In this tutorial, you will find step-by-step instructions on how to use advanced CSS selectors for scraping just about any website.
In particular, I’ll show you how to use Google Chrome’s developer tools to isolate elements you want to capture, copy-paste their CSS selector and use these natively inside Hexomatic.
To begin, you need to have a Hexomatic.com account.
Step 1: Create a new scraping recipe
Go to your dashboard and create a blank scraping recipe
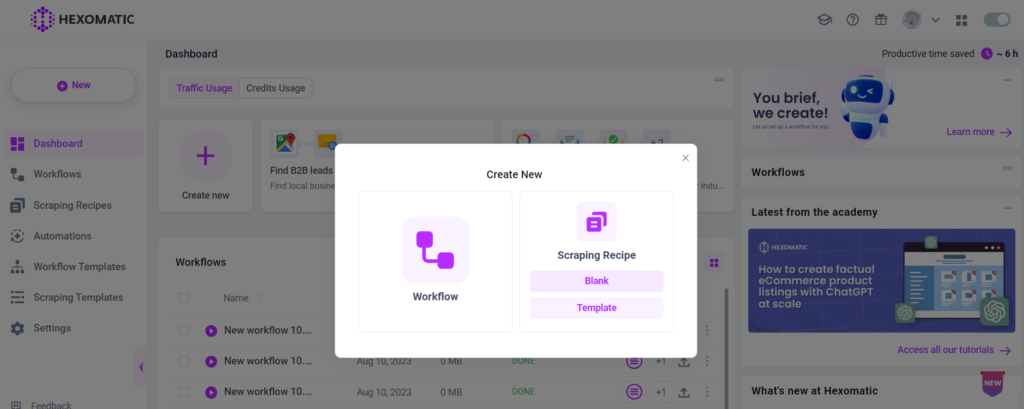
Step 2: Add the page URL
Go to the website you want to scrape and capture its URL.
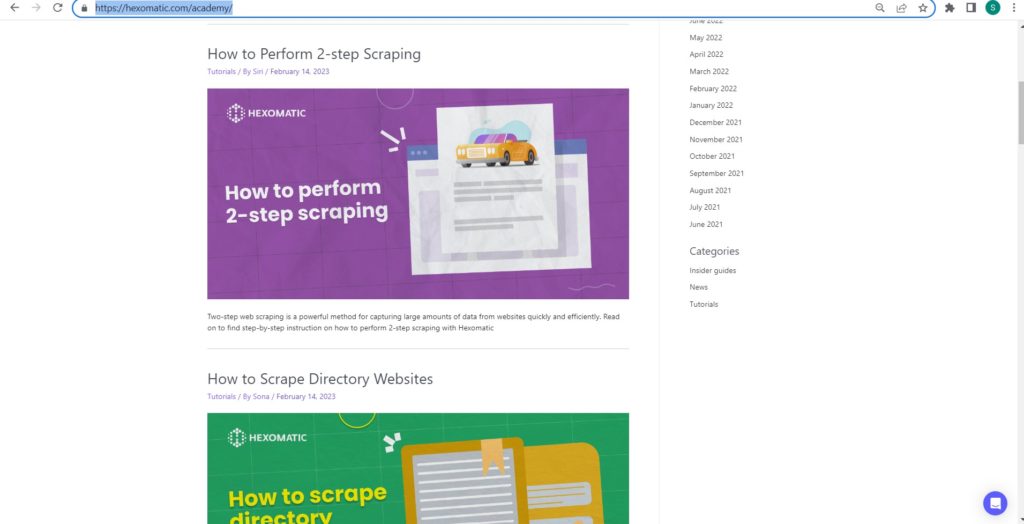
Then, paste the URL to the Hexomatic scraping recipe builder and click Preview.
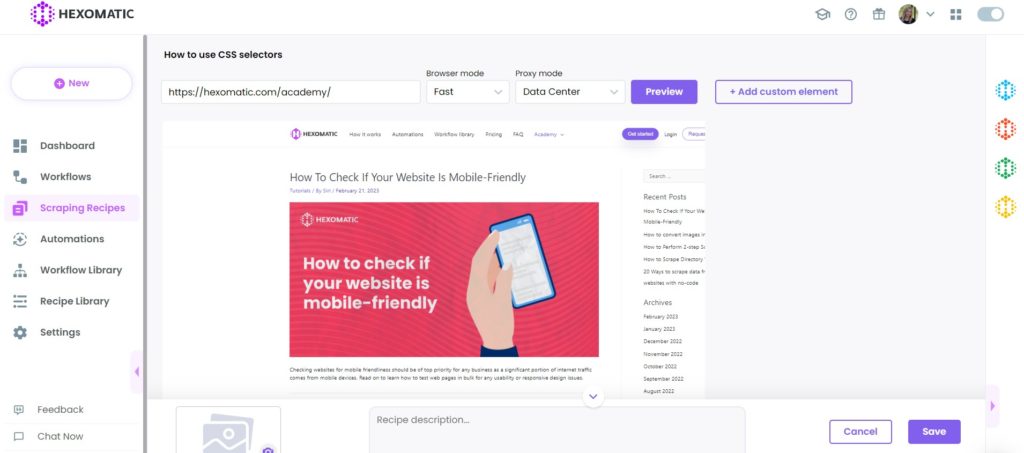
Step 3 (A): Select elements to scrape normally
Normally, when you scrape websites with Hexomatic, you can use the automatic selectors.
So, we can simply click the title here -> Select All and we can scrape all the article titles and select Link as the element type.
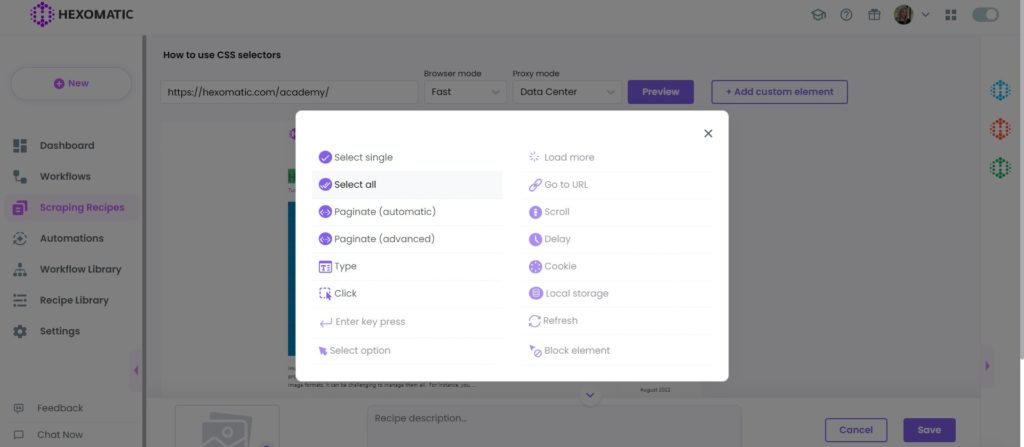
This is the automatic way Hexomatic detects and scrapes elements from the page.
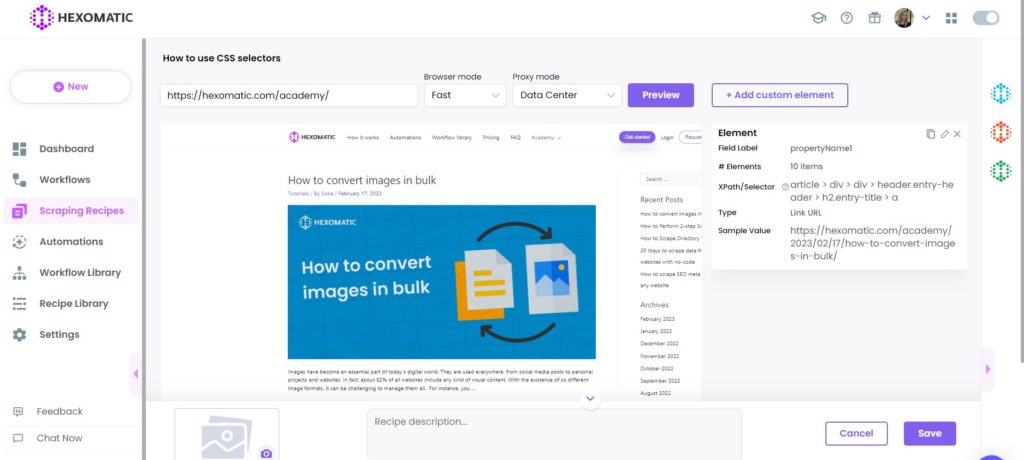
Step 3: (B) Select elements using CSS selectors
However, sometimes HTML and JS used on pages prevent pages from scraping.
For such cases, you can use CSS selectors instead.
To do that, simply, open the page you want to scrape using, for example, Google Chrome.
Right-click on the page and select Inspect.
Next, choose the element you want to scrape. In this case, it’s the title, then right-click again choosing Copy selector.
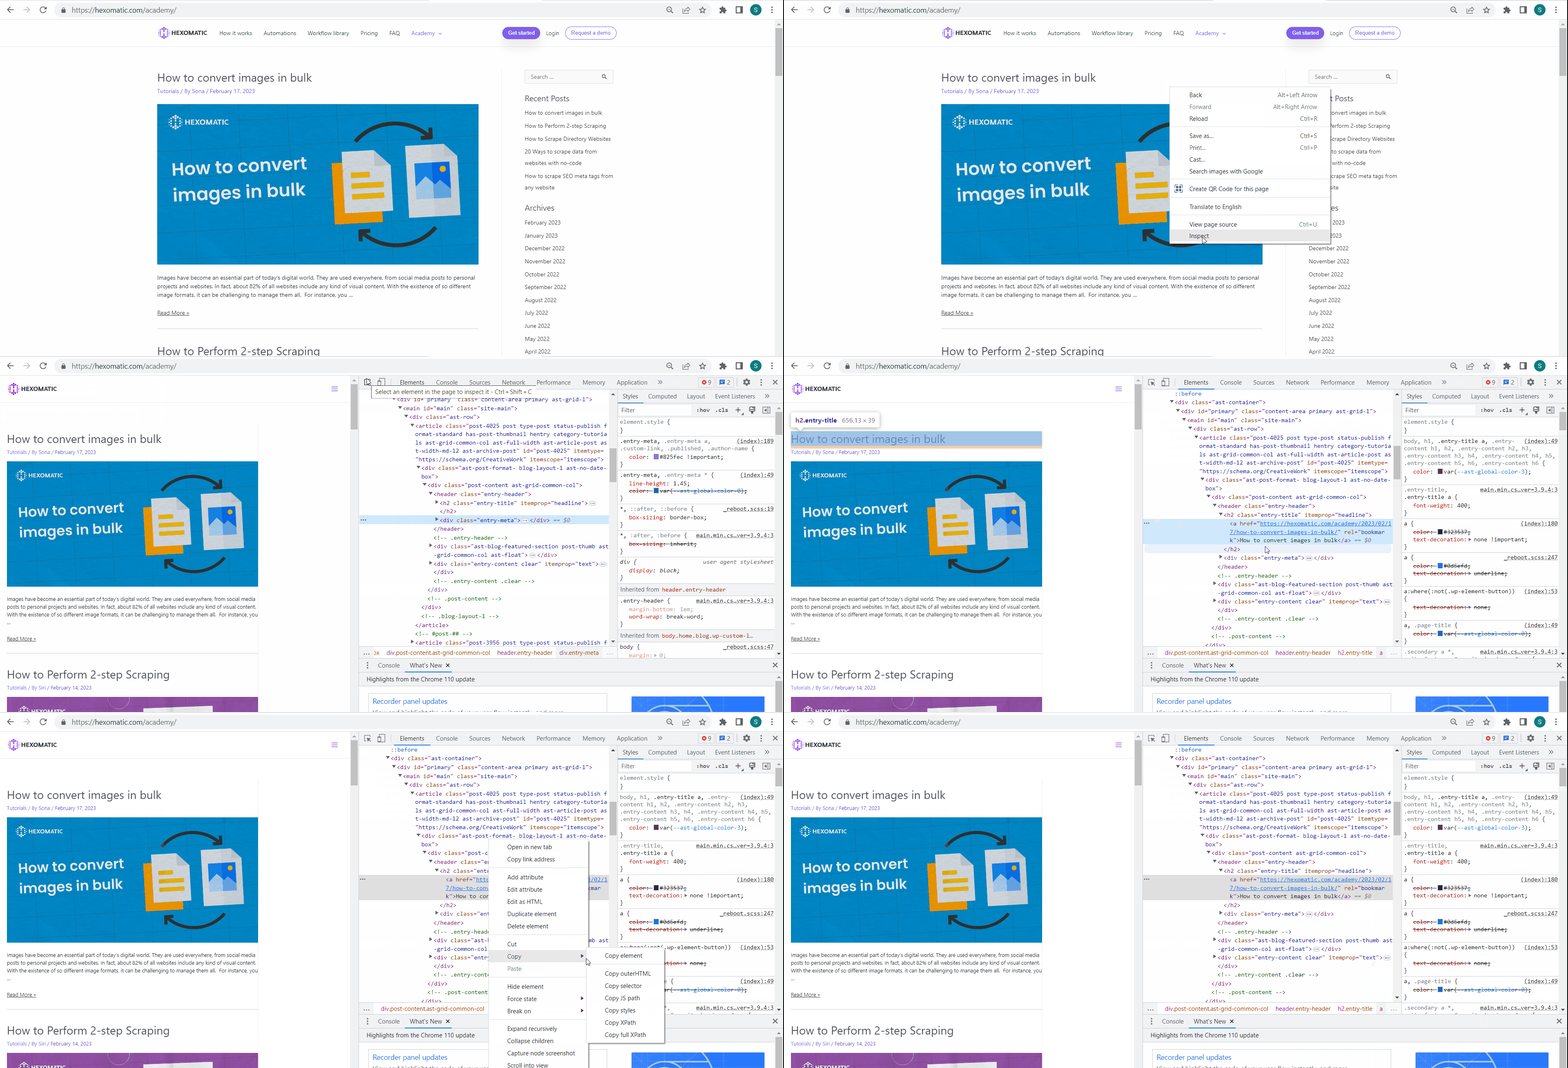
Let’s get back to our scraping recipe. Click Add actions to be able to insert the captured CSS selector.
Next, paste the selector in the Selector field, choose Link URL as the type, and save the element.
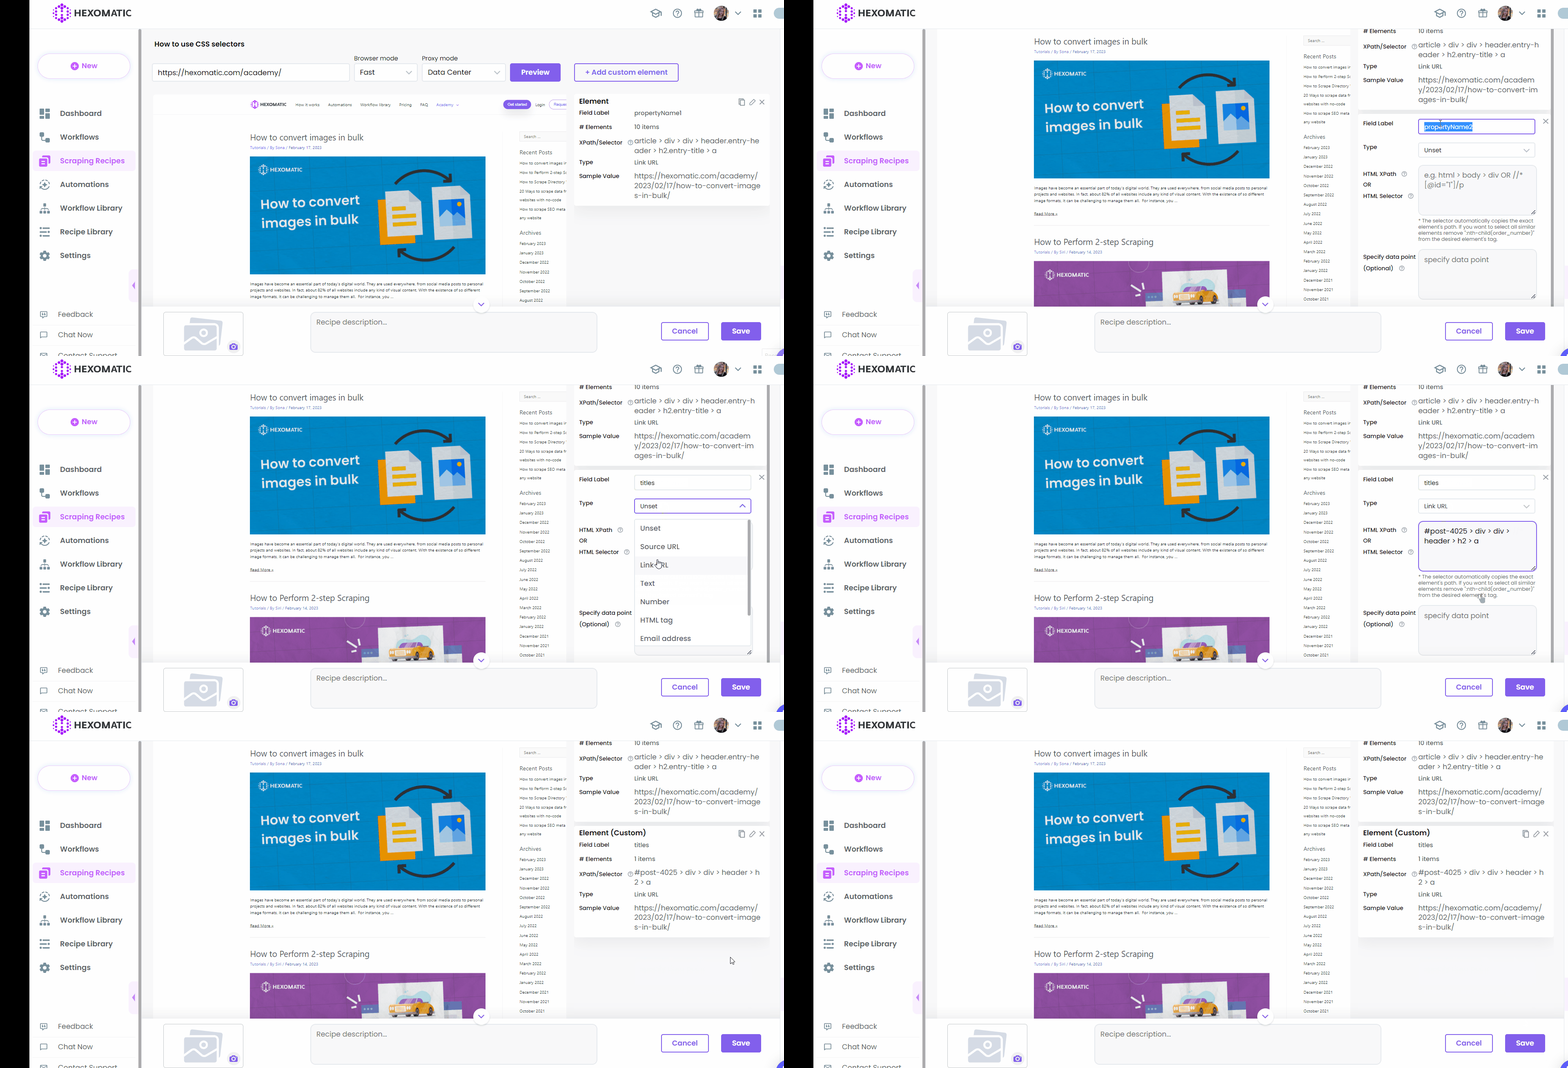
This shows as our sample value and, in this case, it only finds one element.
Next, let’s see how to edit the selectors to have all the elements detected on the page.
Step 4: Edit CSS selectors
It is possible to get all the elements of the same category on the page by clicking on Edit and removing the part that stands div so that we have a CSS selector for all the targeted elements on the page, not a single one.
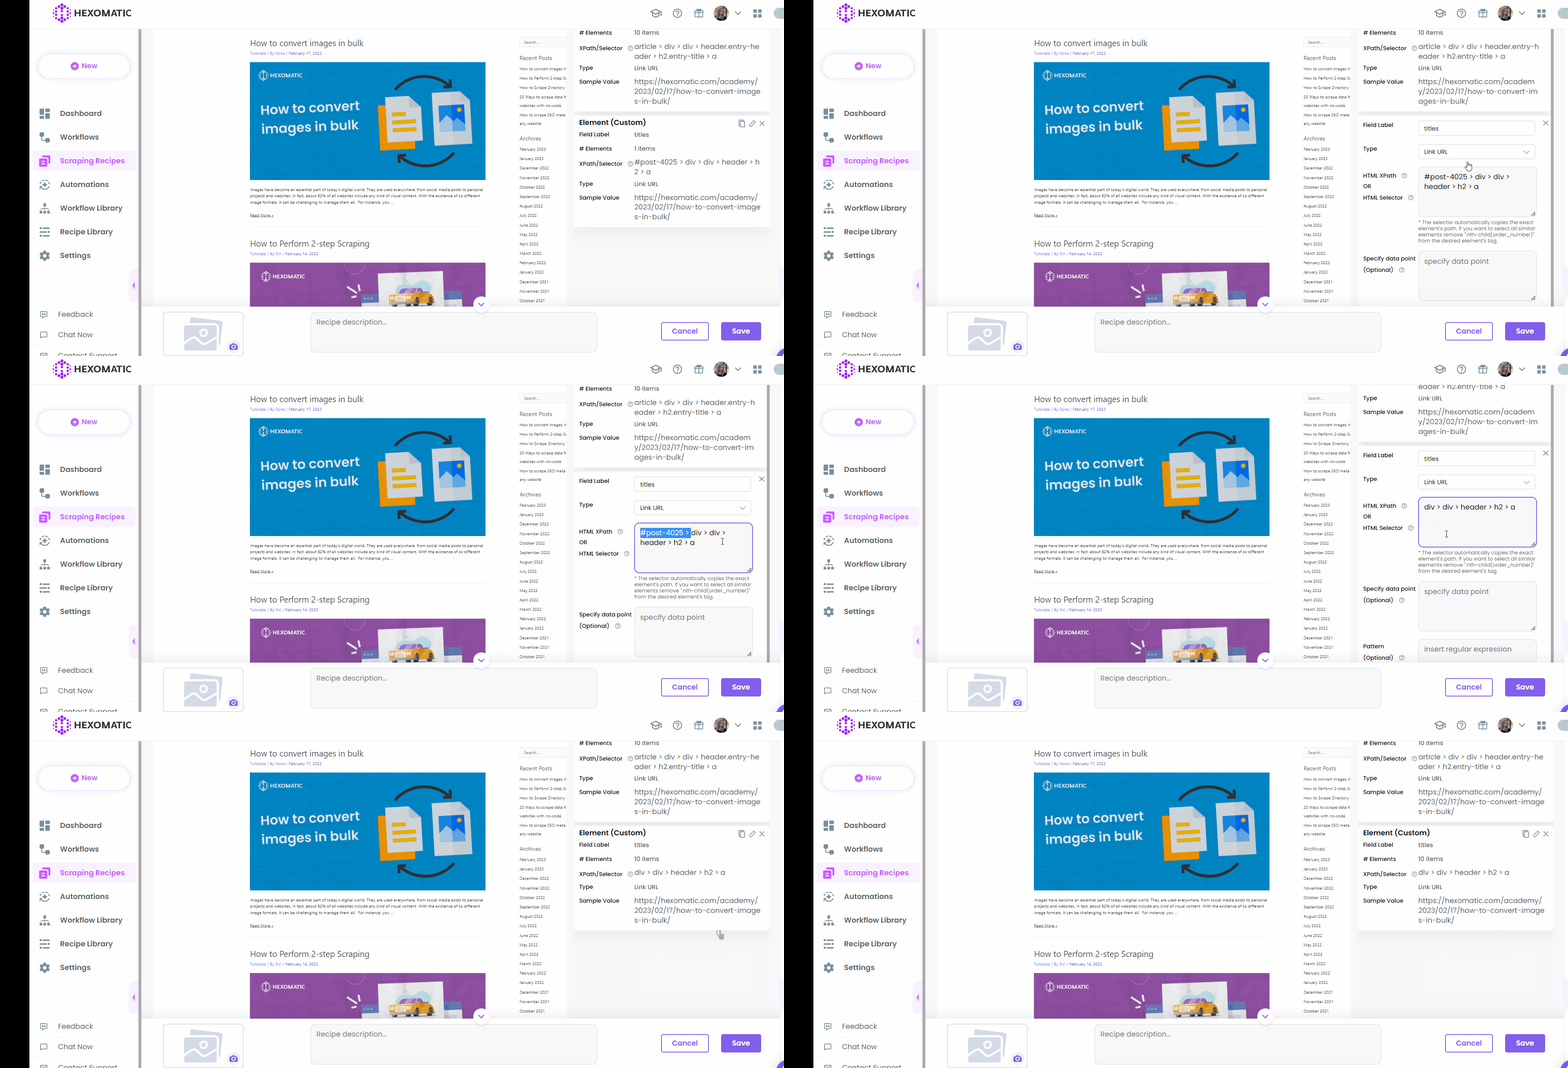
So, now we have all the 10 article URLs detected on the page.
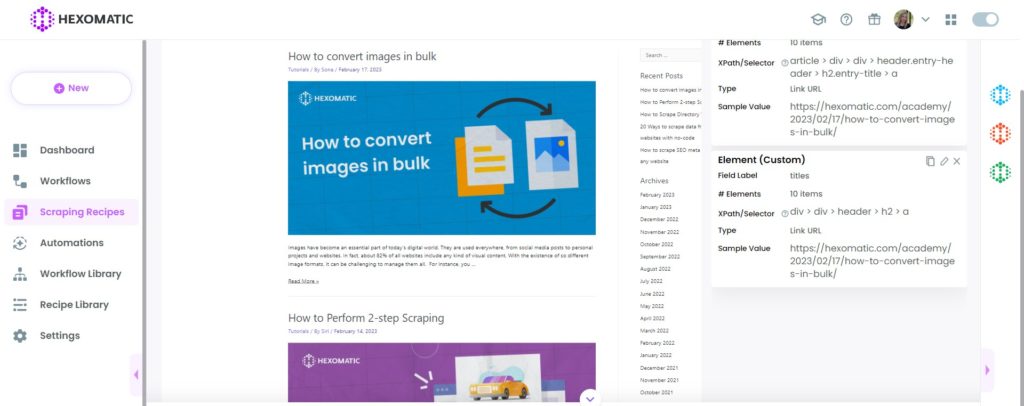
Now, that we have all the necessary elements scraped, let’s Save the recipe.
Step 5: Use the recipe in the workflow
To view the results of the recipe, it is necessary to run it in the workflow.
To do that, go to your Scraping recipes, choose the recipe, and click Use in a workflow.
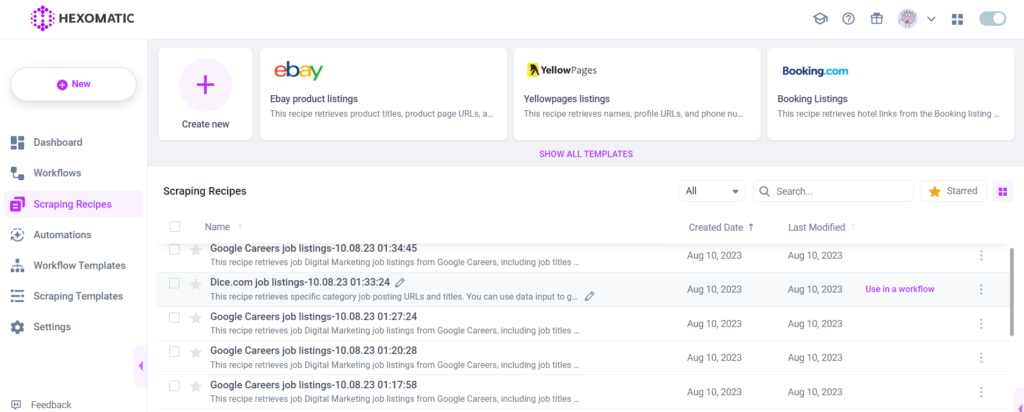
Once the workflow has been created, click Continue.
Step 6: Run the workflow
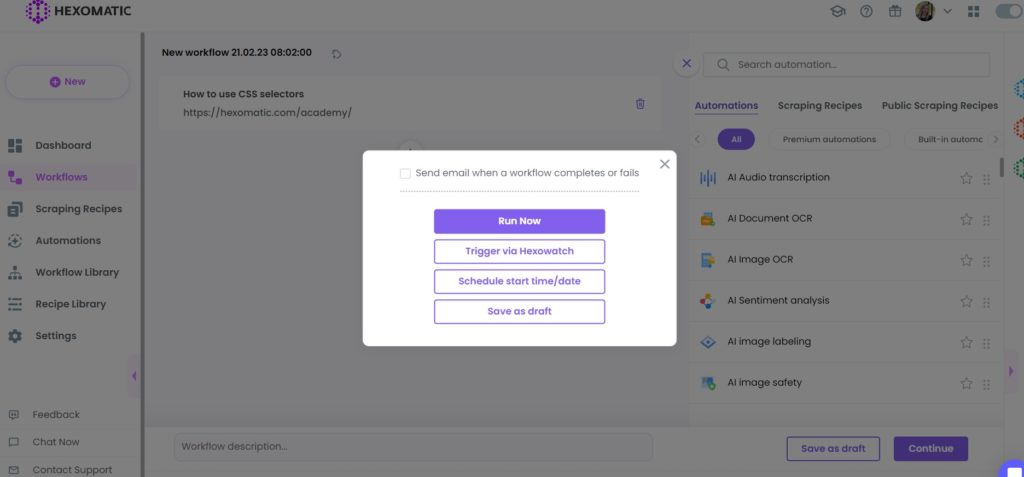
Click Run now to proceed with the workflow.
Step 7: View and save the results
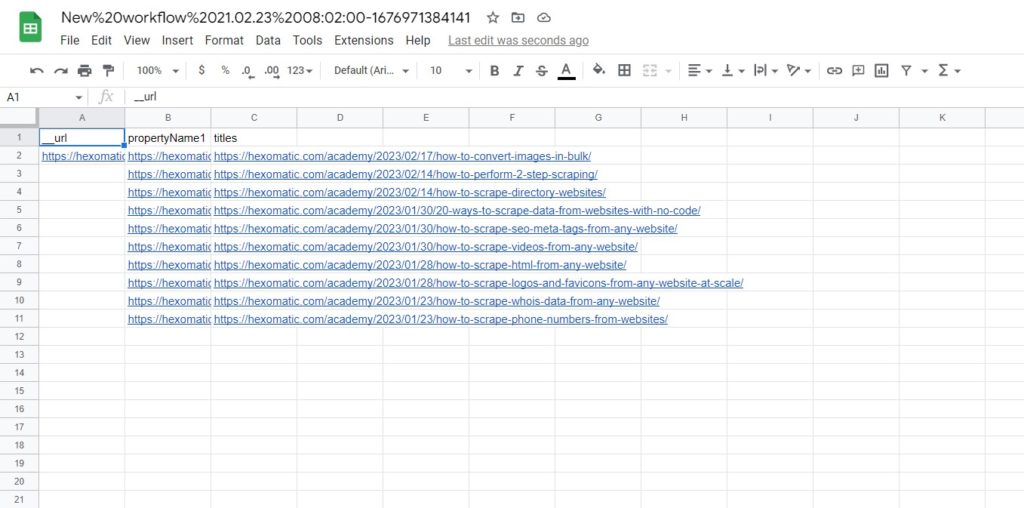
Once the workflow has finished running, you can view the results and save them in a convenient spreadsheet format, like Google Sheets or CSV file.
Automate & scale time-consuming tasks like never before

Marketing Specialist | Content Writer
Experienced in SaaS content writing, helps customers to automate time-consuming tasks and solve complex scraping cases with step-by-step tutorials and in depth-articles.
Follow me on Linkedin for more SaaS content
