Did you know that 75 percent of resumes are rejected before even reaching the hiring manager?
Finding your dream job can be a hard and intimidating process, especially in highly competitive fields such as data science, engineering, marketing, etc.
A key factor to consider is speed, and in particular trying to be one of the first to apply for any position to ensure you have the best chances of getting the interview.
This is where scraping can provide you with a huge competitive edge by enabling you to:
-Scrape your dream companies to work for new vacancies daily
-Scrape recruitment pages to analyze data metrics such as salary, in-demand skills, and more
-Scrape aggregators to uncover who is hiring and which positions are hot
Another factor is getting more data to prepare for the interview and negotiating your salary.
The problem here is that You don’t want to ask for more than they can pay and you also don’t want to ask for less than the other companies are ready to pay.
The solution for this is again proper industry research. Job scraping can come in handy for all the above-mentioned cases.
The good news is that with Hexomatic you don’t need to be a data scientist to take advantage of web scraping.
In this tutorial, we will show you how to scrape job postings in minutes to help you get your dream job in a few clicks.
You will learn:
How to scrape the different positions available on a vacancy page.
How to scrape all the data for each vacancy.
And how to combine two scraping recipes to perform both actions in one workflow
Let’s get started.
Not a Hexomatic user yet? Click here to register for a free account.
How to scrape the different positions available on a vacancy page
Step 1: Create a list of vacancy pages for your dream job companies
Companies typically have a vacancies page where they list all their current vacancies.
So first make a list of their vacancy page URLs.
Step 2: Create a new scraping recipe for each company
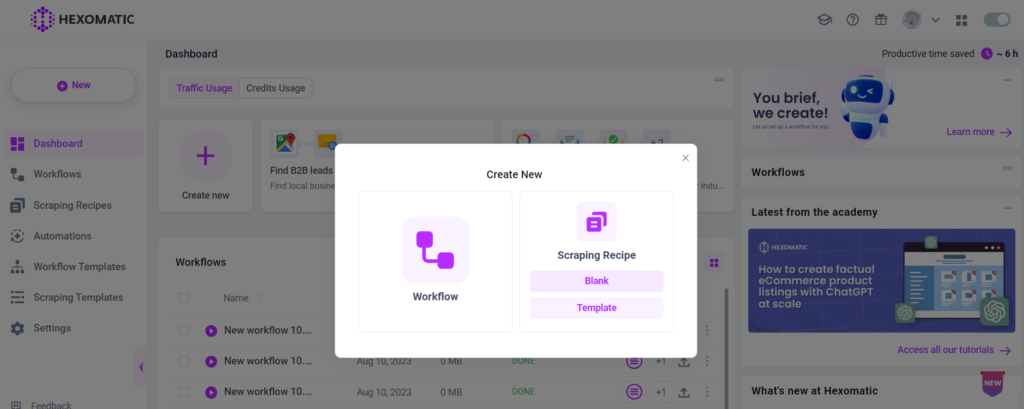
To get started, create a blank scraping recipe.
Step 2: Add the web page URL
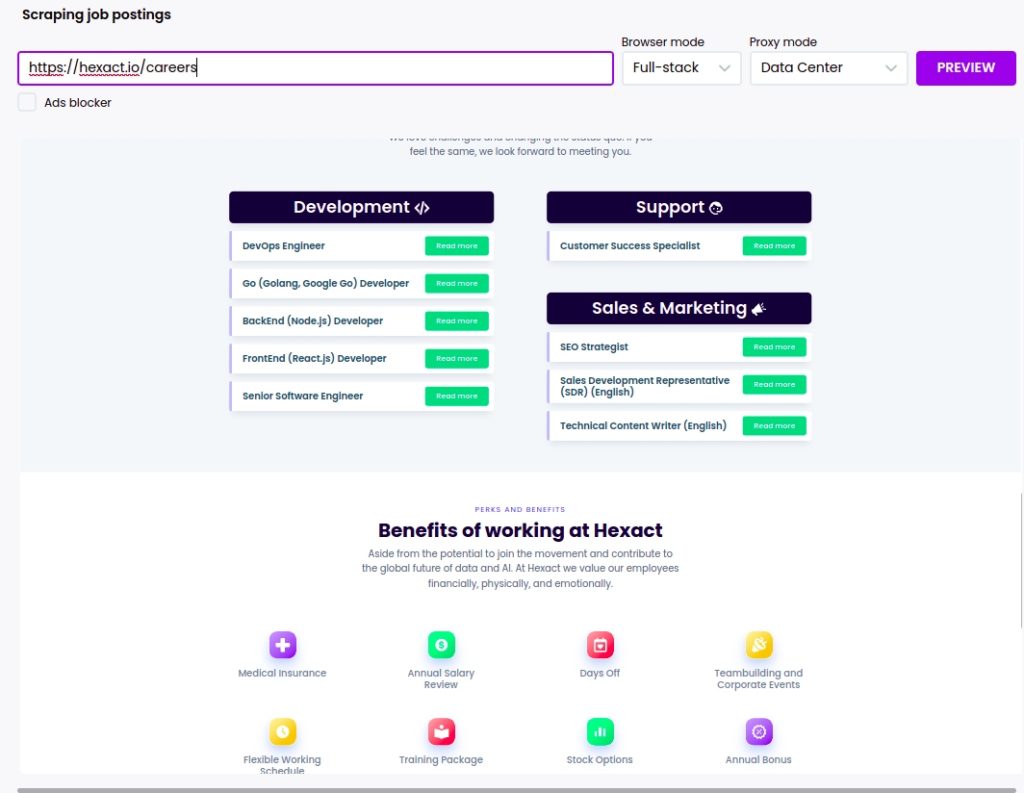
Add the web page URL and click Preview.
For getting better results, we recommend you to use Full-stack browser mode.
In this case, we will scrape the Hexact vacancy page: https://hexact.io/careers
Step 3: Select elements to scrape
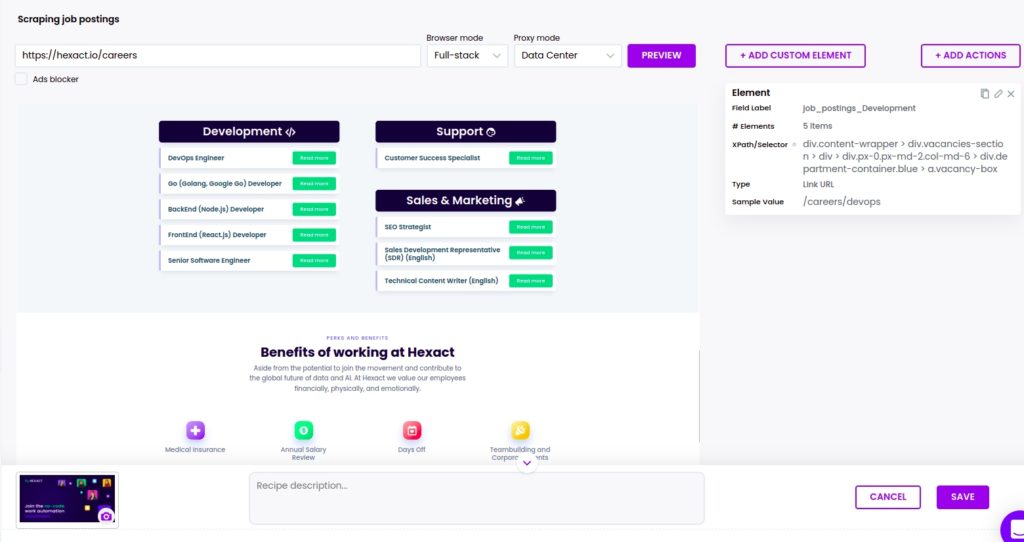
We have a list of job postings, so we can perform a two-step scrape:
First, create a scraping recipe to get the urls of each vacancy, then in another step we will create a scraping recipe to get all the details from each vacancy detail page.
To scrape the list, you need to click on the element and click “select all” to scrape all the elements of the same category. You need to choose Source URL as the element type to scrape the URLs of announcements.
After adding all the elements, click Save.
How to scrape all the data for each vacancy
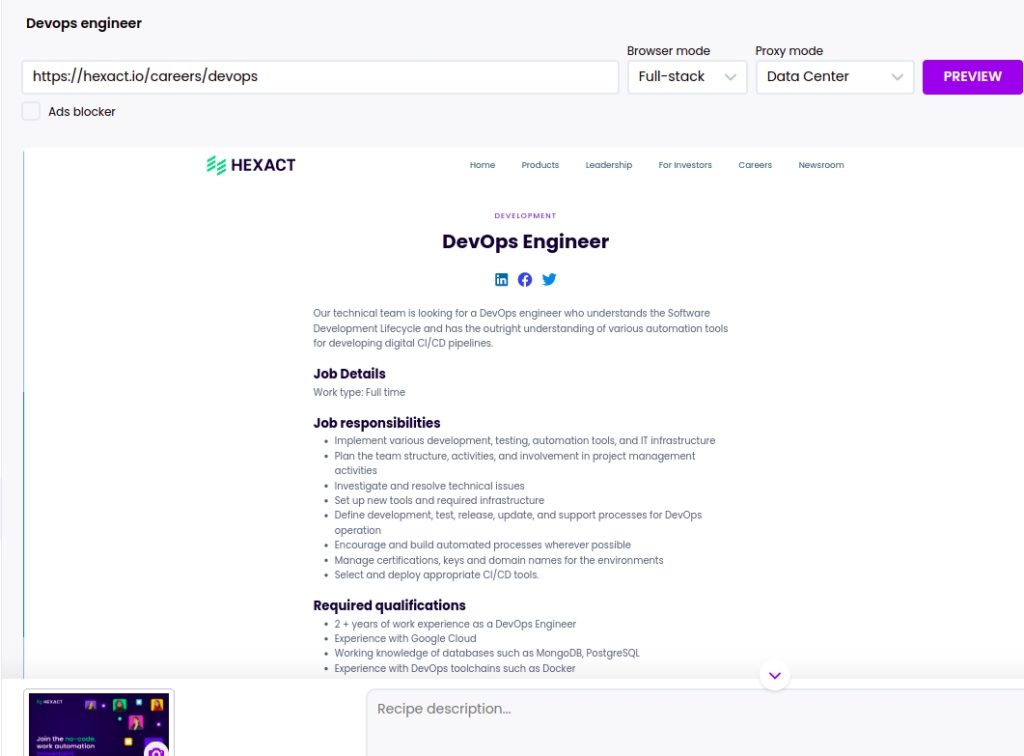
Step 1: Create a second scraping recipe to get the details for each job vacancy page
Now, let’s see how you can scrape a separate job announcement. Go to the web page of the announcement and capture its URL.
Then, create a blank scraping recipe, adding the captured URL.
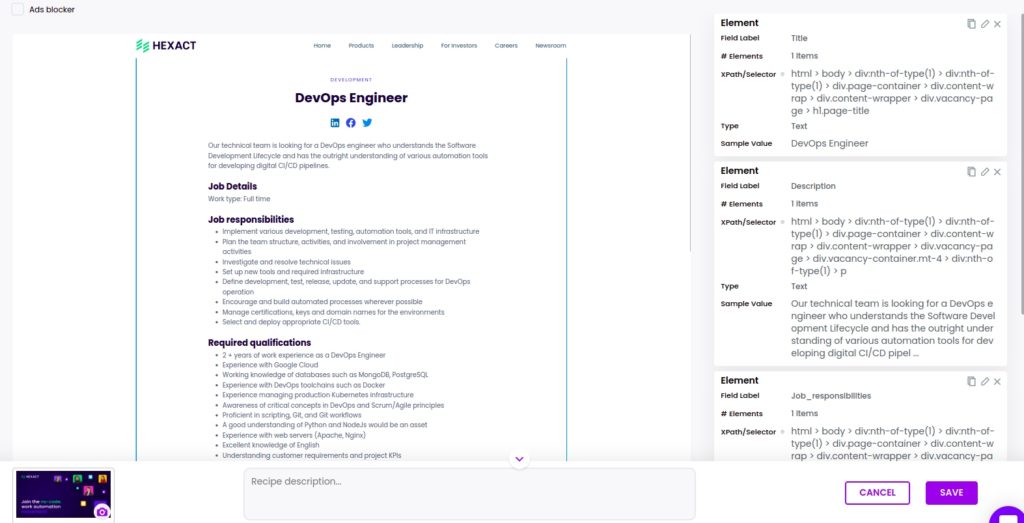
Step 2: Select elements to scrape
Now you can select to scrape anything related to a specific job announcement, including the title, description, requirements, and more.
Combine two scraping recipes to perform both actions in one workflow
After scraping a specific job announcement, you can automatically scrape data from the rest of the announcements without having to create another scraping recipe.
All you need to do is create a new workflow from data input and add the URLs of the next job announcements from the previously scraped list.
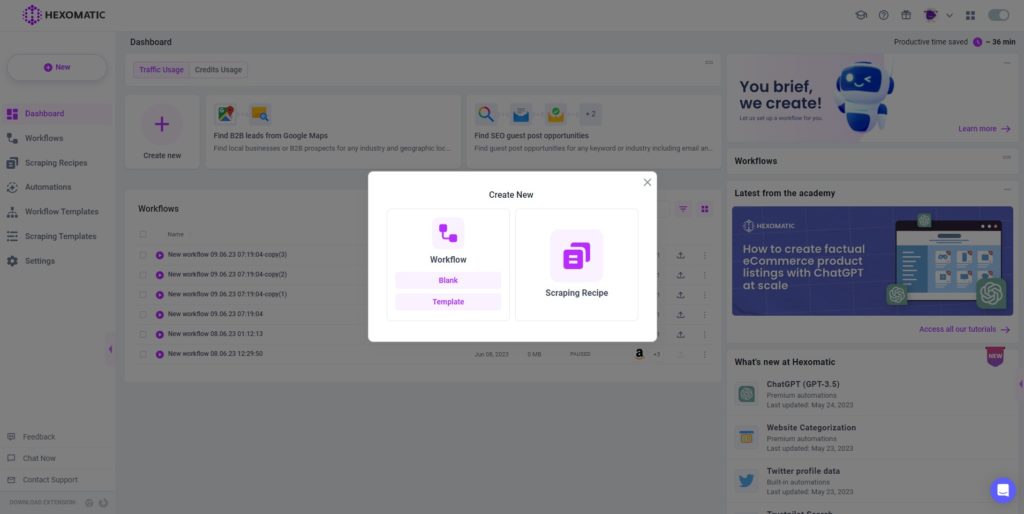
Step 1: Create a new workflow
Create a new blank workflow and choose the data input automation as your starting point.
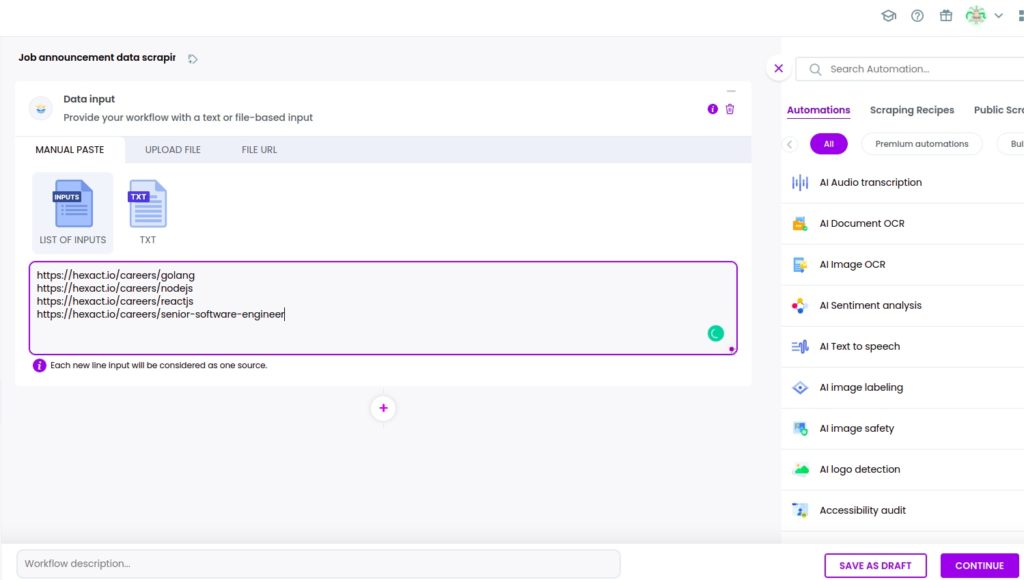
Step 2: Add webpage URLs
Add the next job announcement page URLs from the previously scraped list.
Step 3: Add the previously created scraping recipe
Now, you need to add the previously created scraping recipe, selecting data input as the source.
Then, click Continue.
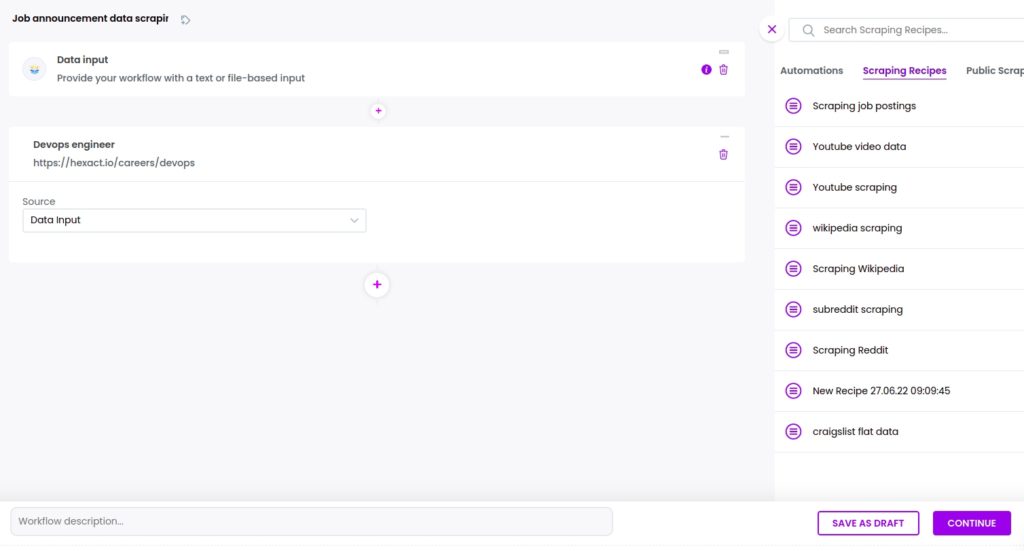
Step 4: Run the workflow or schedule it
Now, you can run the workflow.
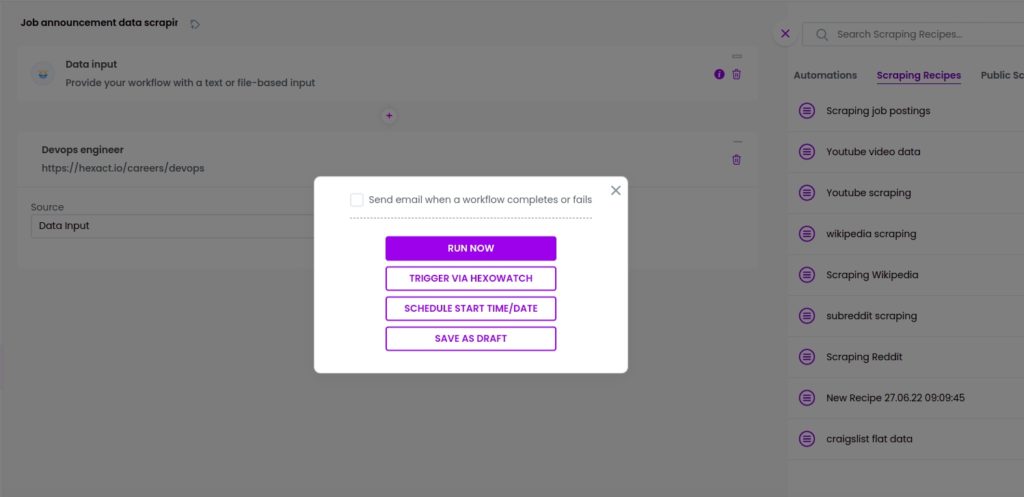
Step 5: View and save the results
Once the workflow has finished running, you can view the results and export them to CSV or Google Sheets.

Automate & scale time-consuming tasks like never before

Marketing Specialist | Content Writer
Experienced in SaaS content writing, helps customers to automate time-consuming tasks and solve complex scraping cases with step-by-step tutorials and in depth-articles.
Follow me on Linkedin for more SaaS content
